BrainVoyager v23.0
Volume Rendering of High-Resolution Grid Data
A special volume rendering tool has been made available in BrainVoyager 20.2 that is intended for the visualization of "flattened" volume representations converted from sampled cortical depth grids (see below). This special volume renderer is able to show grids and text in the generated plots, which is not yet available in the new real-time volume renderer introduced with BrainVoyager 23.0. It is, however, planned to add these possibilities to the new standard volume renderer and to then deprecate the volume renderer described in this section.
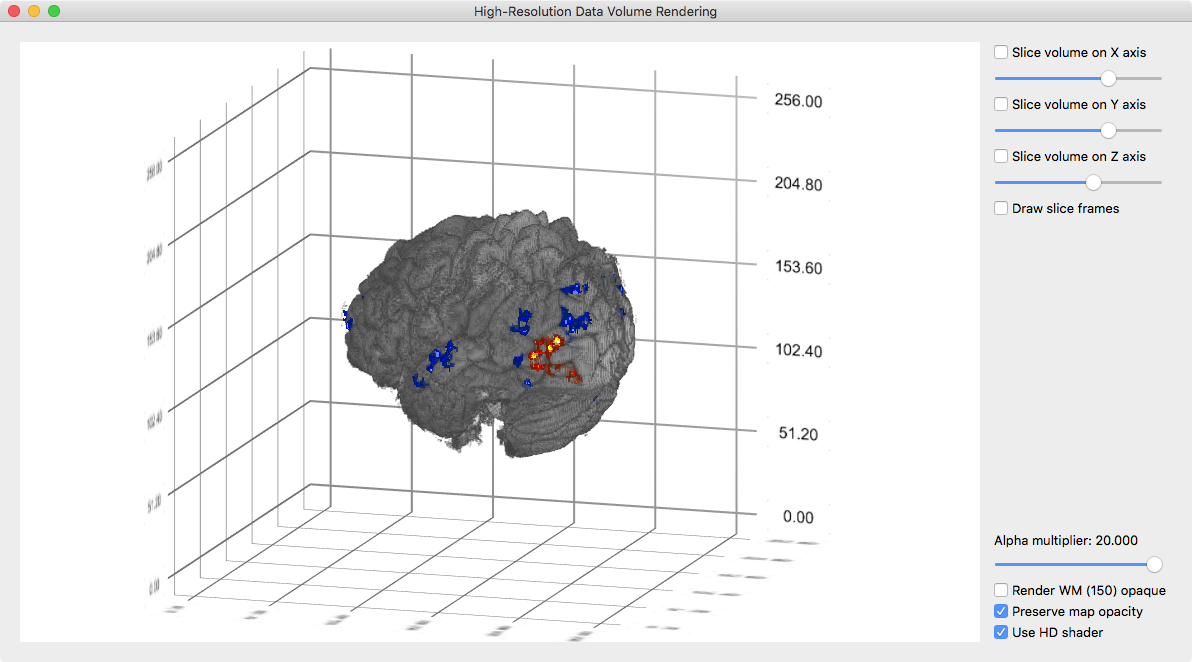
The High-Resolution Data Volume Rendering dialog (see snapshot above) can be invoked by clicking the High-Res Grids Volume Rendering item in the Volumes menu. As default the dialog shows the rendered content of the current VMR data including defined volume maps. Note that at present only positive map values are rendered (negative maps need to be created as separate positive data if needed, e.g. by defining inverted contrasts in the context of statistical GLM-based maps). For best results, map colors should be displayed using overlay look-up tables (OLTs) such as the "ProbMap_Red.olt", "ProbMap_Green.olt" and "ProbMap_Blue.olt" files instead of color range definitions.

The view can be rotated with the left mouse and zoomed using the mouse wheel. Transparency of the VMR intensities can be increased by moving the Alpha multiplier slider to the left and increased by moving it to the right. If the Preserve map opacity option is turned on (default) the rendered map clusters are not affected by the transparency modulation, which is often desired, especially for glass brain like views, i.e. when rendering the anatomical data (almost) fully transparent. On the right side of the figure above, the Preserve map opacity option has been turned off, which lets the map values participate in transparent rendering.
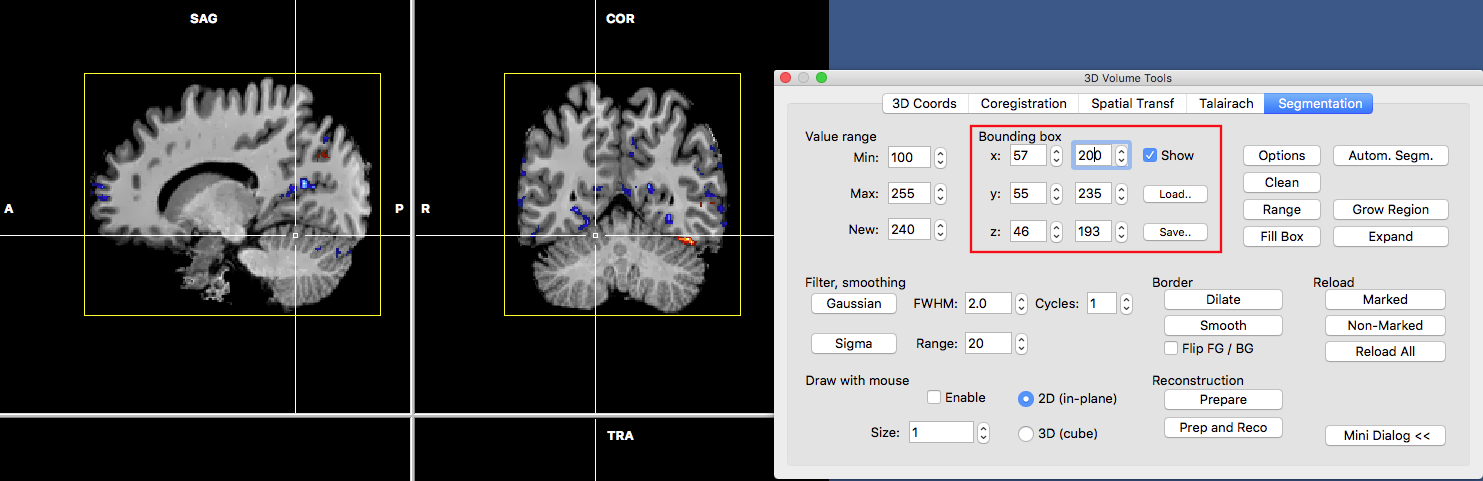
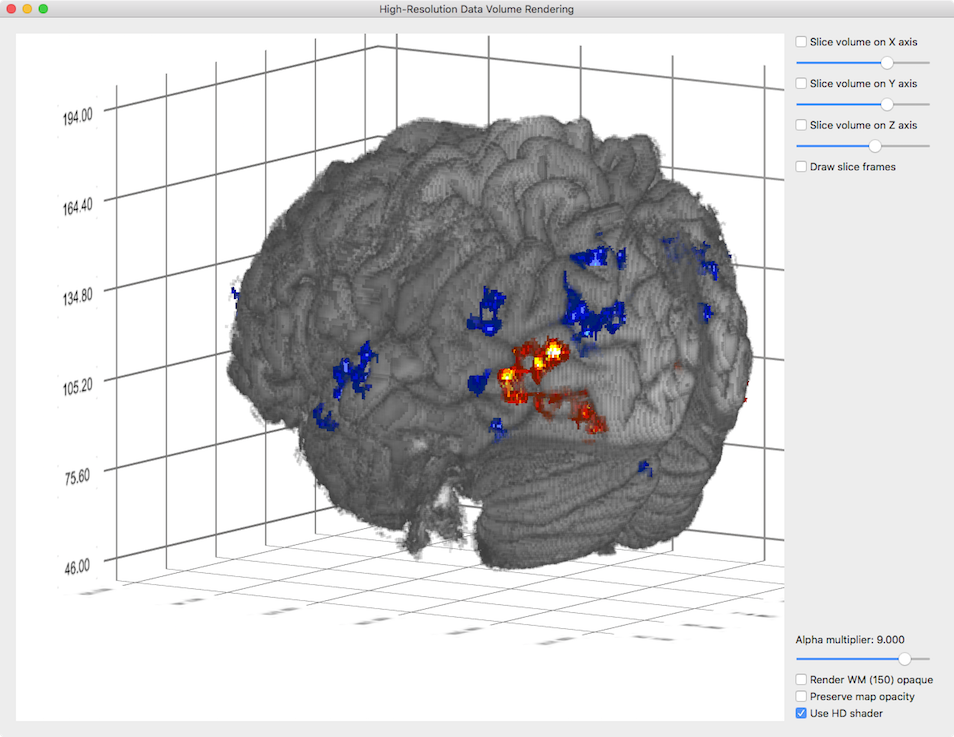
For more detailed renderings, it is useful to select a subvolume of a data set for volume rendering. This is possible by specifying start and end values in the X, Y and Z boxes in the Bounding box field of the Segmentation tab of the 3D Volume Tools dialog (see red rectangle in the snapshot above). In case that the Show selection box is turned on, the current state of the defined bounding box is shown with yellow lines in the associated VMR view (see above). Note that defined bounding boxes can be saved and later reloaded using the Load and Save button in the Bounding box field, respectively. The snapshot below shows the result when restricting the rendering volume to the sub-voilume defined above.
A bounding box has also been defined for a region segmented around motion sensitive area hMT+ for an experiment presenting horizontal (green map colors) and vertical (red screen colors) motion. On the left side, the segmented part is shown within the space of the whole brain while on the right side a bounding box has been defined around the segmented region.

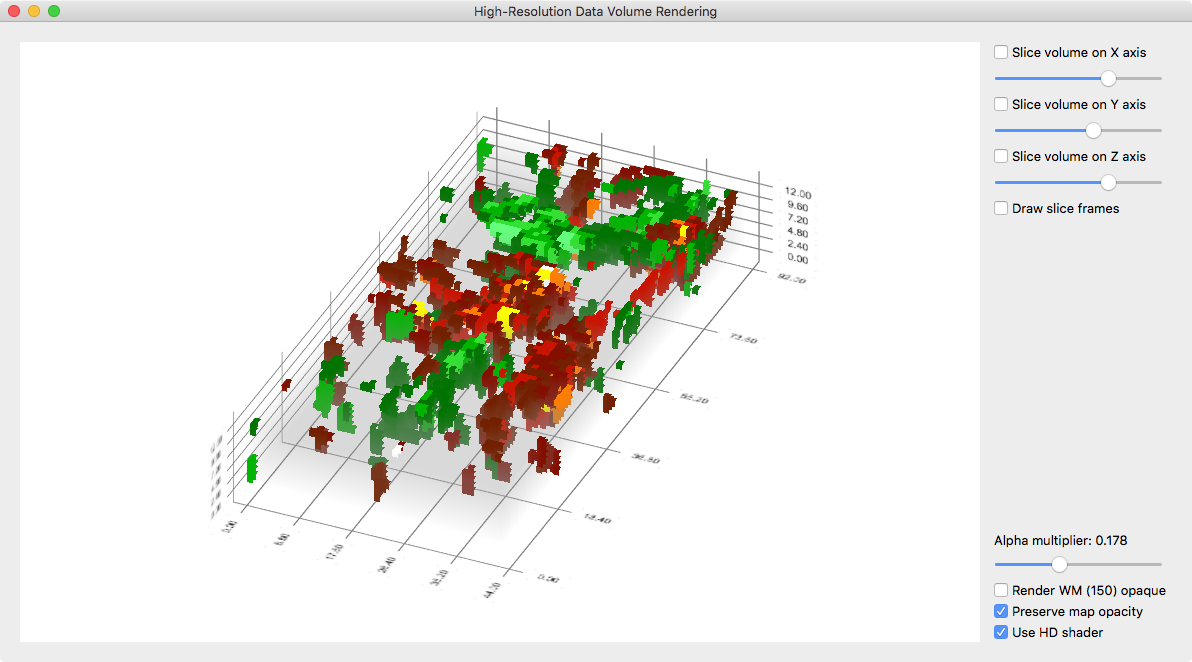
The renderings above use the special Render WM (150) opaque option, which is provided especially for datasets that have run through the advancerd (automatic or manual) segmentation ("_WM_GM.vmr" files); in these files white matter has an intensity value of 150 and grey matter a value of 100. Like functional map data, this option excludes white matter from transparency effects. This makes it possible to selectively render grey matter (partially) transparent to reveal in detail how functional data extends along cortical folds wihtin grey matter. When creating cortical depth grids for such high-resolution data, the data within grey matter can also be shown in a "flattened" volume view using the grid volume renderer as shown below (for more details, see topic Depth Grids as Flattened Volumes).
Using the sliders in the right upper section of the dialog after checking one or more of the Slice volume on X axis, Slice volume on Y axis and Slice volume on Z axis selection boxes will show orthographic slices through the volume data (see snapshot below for an example). To go back to volume rendering, all three volume slicing boxes need to be deselected.
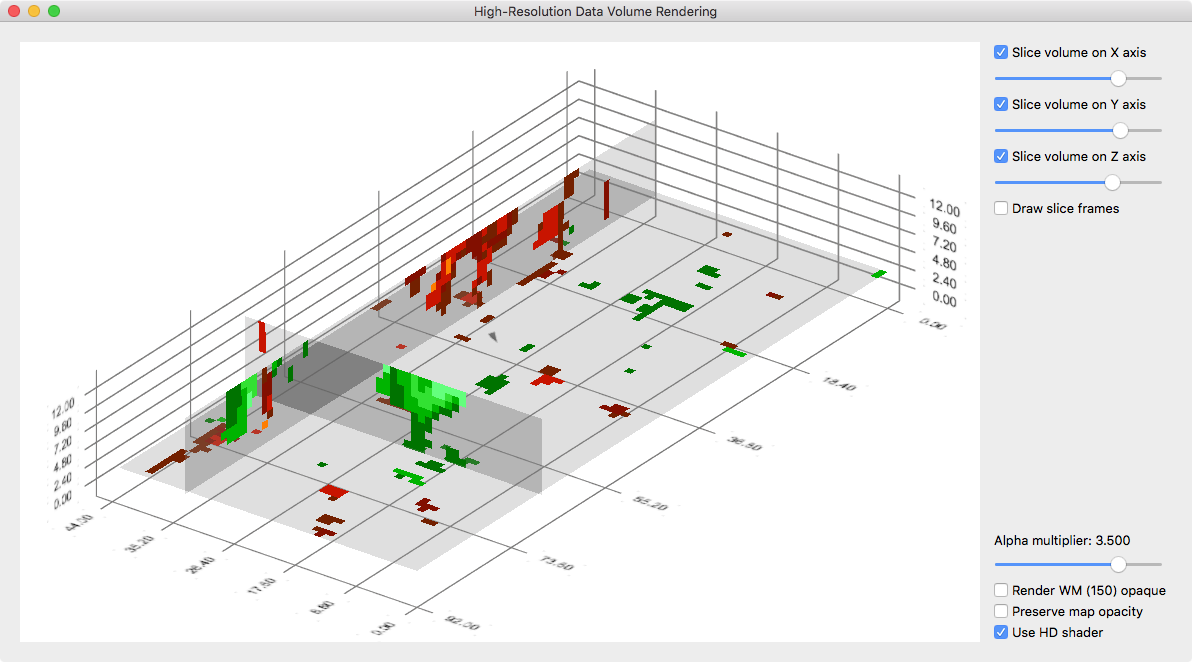
The Show slice frames option can be used to show black outlines around the rendered slices. The Use HD shader option is turned on as default providing qualitatively better renderings than when using standard OpenGL shaders. This option only should be turned off if rendering is slow when using the high-definition (HD) OpenGL shaders.
Copyright © 2023 Rainer Goebel. All rights reserved.