BrainVoyager v23.0
VOIs from Numerical Region Labels
When importing anatomical atlas volumes stored in NIfTI (or other) files, intensity values often correspond to numerical labels identifying segregated brain regions. In that way multiple regions can be identified, each with a specific intensity value (numerical label). These numerical labels may be, for example, the result of manual or automatic region segmentation or the result of a maximum probability map (MPM) operation. In BrainVoyager, MPMs are created as overlay (volume or surface) maps but a convenient way to share such maps is to store them as numerical labels in a single anatomical file. Such numerical labels can be converted one-by-one to VOIs using the Define VOI operation in the Volume Tools Options dialog but this is a laborious process when handling more than a handful of region labels. Converting numerical labels to VOIs not only aids in visualization but also allows to use BrainVoyager's powerful VOI tools, e.g. for data extraction and region-based statistical analysis.
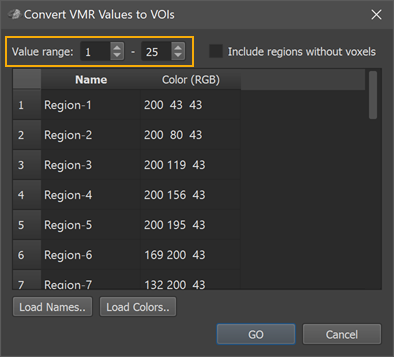
In order to automate the VOI conversion process, the Convert VMR/V16 Values to VOIs dialog (see screenshot above) can be used (introduced in BV 21.4 and updated for 16-bit (65534 labels) in BV 22.2). The dialog can be invoked using the Convert VMR/V16 Values To VOIs item in the Volumes menu. When starting the dialog from a current VMR file, the program analyzes the intensity values to determine the minimal and maximal value that will be converted into volumes-of-interest. In the example above, the Value range spin boxes indicate that the smallest detected (non-zero) value is 1 and the largest detected value is 25. For this example, a MPM file (maxprobvollh.nii.gz) is used that is part of a set of probabilistic maps of visual topography provided by the Princeton Neuroscience institute (https://scholar.princeton.edu/napl/resources). After loading the MPM file, it looks like an empty file in BrainVoyager since the numerical label values 1-25 correspond to low intensities in the default visualization mode. To see the regions, one can use the Range tool in the 3D Volume Tools dialog to change the region label values to higher intensity values but this should not be done for the processing described below (i.e. changes should be undone by relaoding the volume file) before proceeding. Note that when the imported file contains more than 254 numerical labels, BrainVoyager stores them in a V16 file, which is attached to the VMR as usual by the same base name. BrainVoyager uses the V16 file (not the visualized VMR which can only discriminate 254 labels) when converting numerical labels to VOIs.
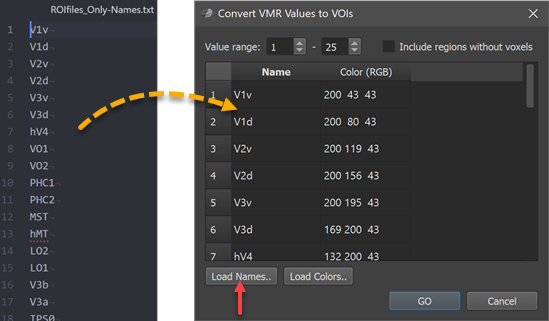
The first column of the Regions table in the Convert VMR/V16 Values to VOIs dialog is filled with generic region names (Region-[N], e.g. Region-1 to Region-25 in the example); the second column is filled with default color (RGB) values (converted from HSV values sampled in equal steps around the color wheel). The suggested default names and colors can be edited in the table. In case that a text file is available or prepared with real region names (one name per line), the names can be specified at once by loading the respective text file using the Load Names button. Similarly, a prepared list of colors can be loaded using the Load Colors button. In the screenshot below, a text file (ROIfiles_Only-Names.txt, left side) with the original region names has been loaded into the Regions table using the Load Names button (right side).
It may happen that one or more numercial labels do not appear in the specified value range, i.e. the corresponding regions are empty. As default empty regions will be skipped, i.e. no VOIs will be created. In case one wants that VOIs are created also for empty regions, the Include regions without voxels option should be turned on. To start the VOI generation process, the GO button needs to be clicked. The program will then define VOIs with all voxels possessing the respective numerical label (intensity value) in the specified value range. Each created VOI will be briefly highlighted in the VMR View window during the VOI generation process and the Volumes-Of-Interest list in the Volume-Of-Interest Analysis dialog will be incrementally filled with the names of the created VOIs.
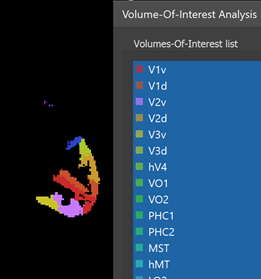
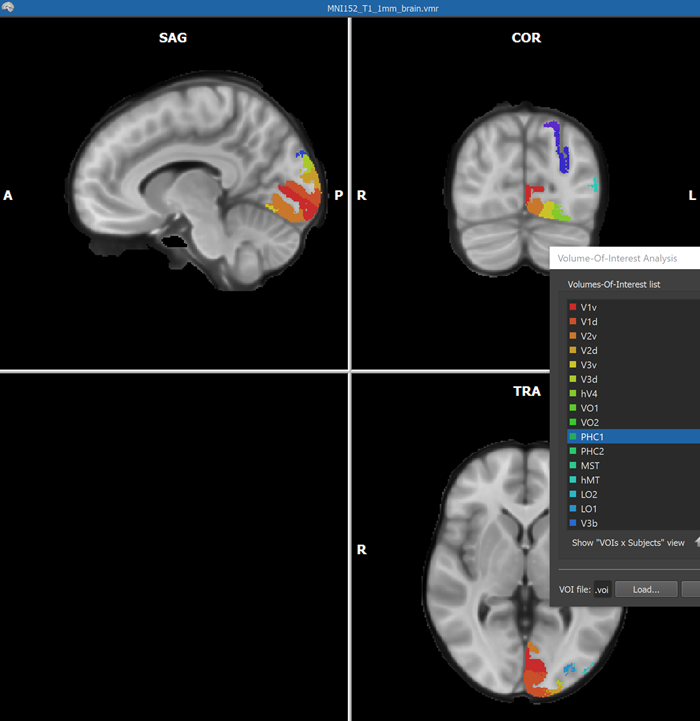
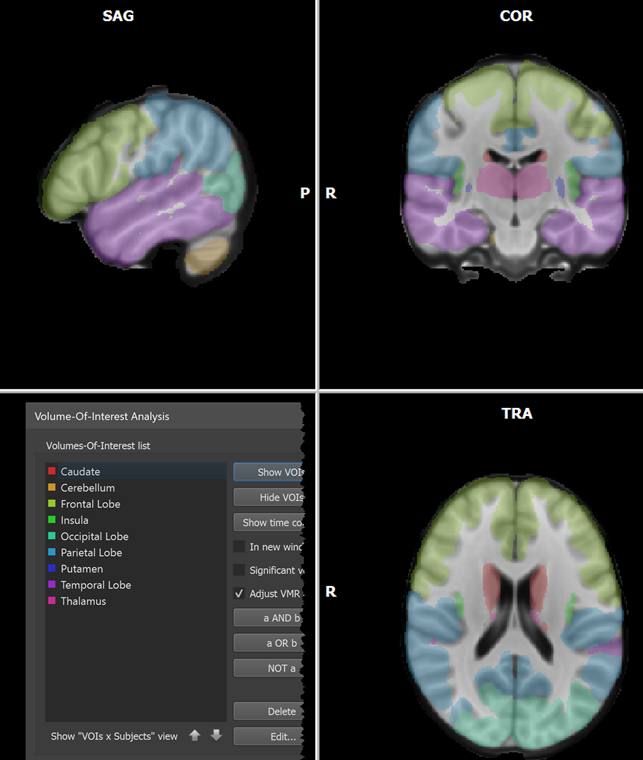
When the process has been completed, all created VOIs are shown in the Volume-Of-Interest list in the ==Volume-Of-Interest Analysis == dialog (see screenshot above). Individual or multiple VOIs can then be shown as usual (all VOIs were selected above using the Ctrl-A (Cmd-A) key combination). In the screenshot above, the generated VOIs are visualized in the original anatomical dataset containing the region labels (which looks empty since the label values 1-25 correspond to low intensities) while in the screenshot below, the generated VOIs are shown on top of a brain in MNI space.
Importing Atlases from FSL
The conversion of numerical region labels to VOIs allows easy import of maximum probability map atlases from the FSL neuroimaging software (https://fsl.fmrib.ox.ac.uk/). The screenshot below shows the launched Convert VMR/V16 Values to VOIs dialog after loading the file MNI-maxprob-thr25-1mm.nii.gz located in the atlas/MNI folder using e.g. the Open NIfTI icon in BrainVoyager's toolbar. After launching the Convert VMR/V16 Values to VOIs dialog, the program detected 9 numerical labels (see Value range entries below). In FSL, region names are stored in XML files from which the names of the regions (contained in fields) can be directly extracted in BrainVoyager.
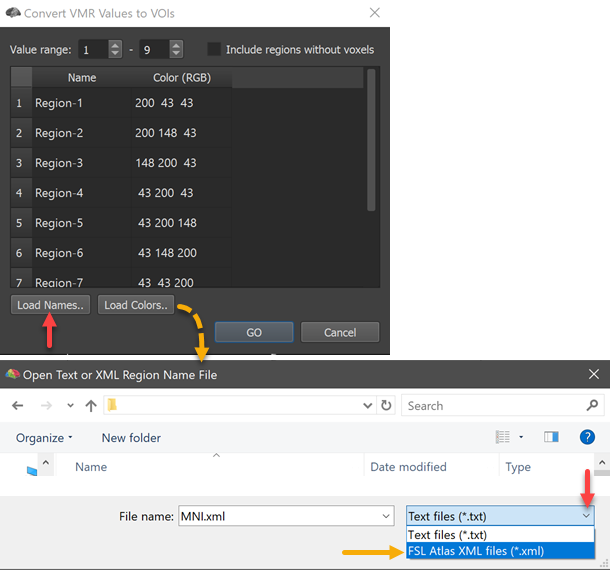
In order to load a matching XML file to an atlas, the Load Names button can be used (see red arrow on left side above). In the appearing Open Text or XML Region Name File dialog, the File Type selection box can be opened to select the FSL Atlas XML Files (*.xml) entry (see red arrow on right side above). Now the MNI.xml file located in the atlas folder can be selected and opened. The names for the contained 9 regions are extracted and appear in the ==Regions ==table as well as in the Volume-Of-Interest Analysis dialog after clicking the GO button in the Convert VMR/V16 Values to VOIs dialog. In the screenshot below, the resulting 9 VOIs were finally overlaid on a standard MNI dataset.
The screenshot below shows another example. Here the Juelich-maxprob-thr25-1mm.nii.gz atlas located in the atlas/Juelich folder has been opened. Since theatlas contains many areas (121), the VMR does not appear dark but some regions with higher label values are visible as shades of grey.
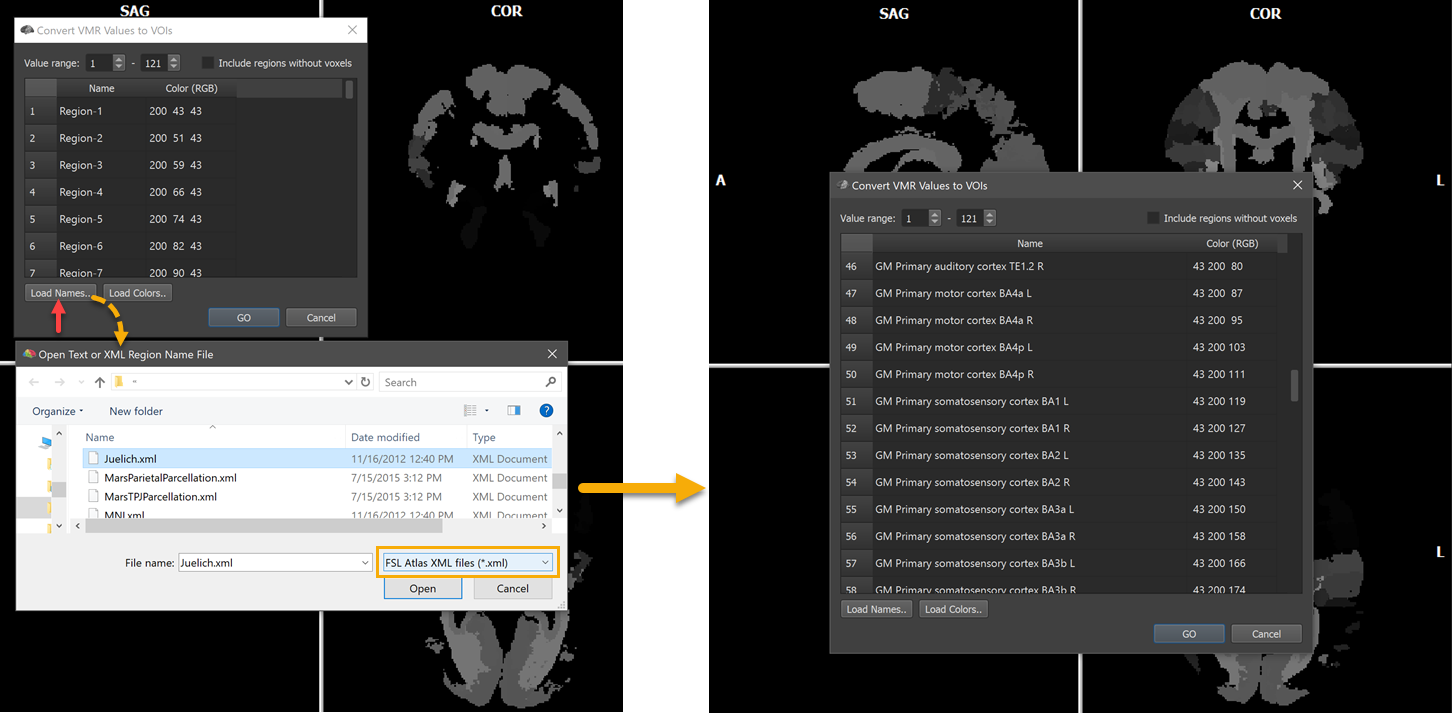
The names of the 121 regions can be loaded as described above by using the Load Names button and selecting the Juelich.xml file in the atlas folder after chosing the FSL Atlas XML files (.xml) file type in the Open Text or XML Region Name File dialog (see left side above). The right side shows some of the names in the Regions table after opening the Juelich.xml file. The VOIs are generated as usual by clicking the GO button. The screenshot below shows a view of the atlas overlaid on a standard MNI anatomy file with the white cross positioned at the Broca's area (BA44).
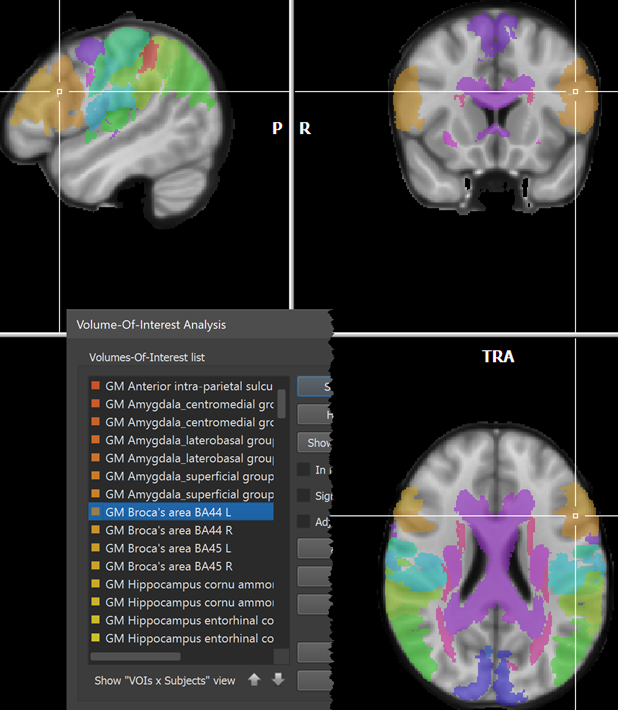
Note that the default colors might label neighboring areas with a very similar RGB value. In order to better separate, e.g. BA44 from BA45, it might be useful to change default colors using the Edit button in the Volume-Of-Interest Analysis dialog.
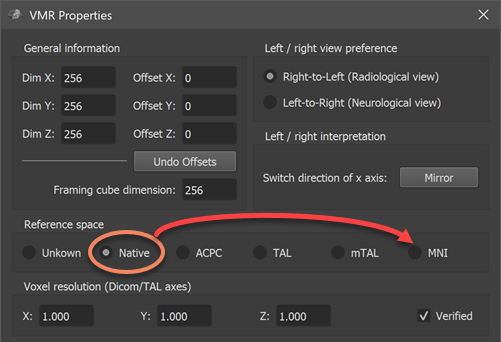
Note. When loading an atlas file from a sub-folder of the FSL atlas directory, the resulting VMR document will be marked as in Native space since the original NIfTI file contains a q-form and s-form code of Aligned (value 2), which is interpreted in BrainVoyager not as aligned to MNI space but to a subject-specific space (see topic Processing NIfTI Files. Since the atlas files are actually in MNI152 space, it is advised to change the VMR space to MNI space using the VMR Properties dialog (see screenshot below) before creating the VOIs from the numerical labels. To keep the MNI space setting, the VMR file can also be saved to disk using the Save Document icon in the main toolbar. Changing the reference space to MNI will avoid potential non-matching reference space errors. While this error does not appear when overlaying Native-space VOIs on a VMR in MNI-space, a matching reference space (e.g. VOIs and VMR document in MNI space) is generally recommended, otherwise non-matching reference space errors may appear when using some VOI functions.
Copyright © 2023 Rainer Goebel. All rights reserved.