BrainVoyager v23.0
Add Subject to Project
Since subject directories (e.g. "sub-01", "sub-02") are discovered automatically after data has been added to the respective folder on disk, subjects need not to be added explicity. It might be, however, useful to add (or later edit) a subject-specific JSON file to store meta-information such as to which experimental group the subject belongs or to store observations.
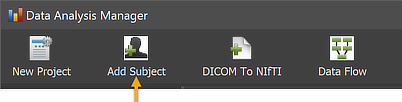
In order to add a subject to the currently selected project, use the Add Subject icon in the main toolbar of the Data Analysis Manager window or the Plus ("+") icon on the left side of the toolbar in the Subjects pane. After clicking one of these icons, the Add Subject dialog will appear (see screenshot below).
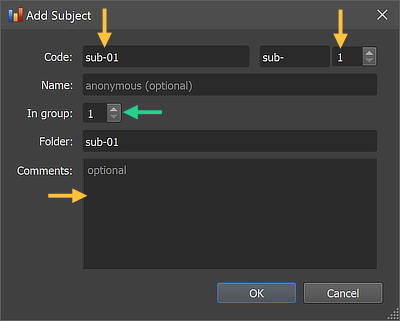
The new subject will be identified by the string in the subject Code text field (see left upper arrow). While BIDS allows non-number strings after the "sub-" string, the dialog enforces a numerical subject code. The number added to the "sub-" string can be adjusted in the Subject Code Number value box (see upper right arrow) by using the up and down spins of the value box or by entering a number directly. If no subject has been added yet to the project, value '1' (and hence 'sub-01' as the subject code) will be set as default. When adding more subjects, the program will automatically increment the subject number to one higher than the currently highest number. In case one wants to store a more expressive identifer name of the subject, the optional Name text field can be used. Note, however, that this should not be the real name of the subject in order to keep data management anonymous. If the subject belongs to a multi-group study, one can also assign the participant to a specific group by entering a group number (1, 2, 3..), which can be used later when running a group-GLM statistics workflow.
The string in the subject Code field will be used as the name of the subject folder that will contain the source data (NIfTI files) of the respective subject. The name of the folder is displayed in the Folder text field ("sub-01" in the screenshot above) and can not be changed (the program checks that subject folder names are unique within a project). The Comments text field can be optonally used to store information about the participant, for example, whether the subject has moved very much during scanning. Group assignment and comments can also be added (or changed) at a later time by either double-clicking the subject code name in the Subjects pane or by clicking on the Edit Selected Subject icon in the toolbar of the Subjects pane after selecting the desired subject in the list.

After clicking the OK button, the new subject folder will be created in the sourcedata folder inside the project folder that is specified when creating a project and the subject name will appear in the Subjects pane of the Data Analysis Manager window (see screenshot above). Note that you can at any time later edit (some of) the information of a subject by either double-clicking the subject name in the Subjects pane or by clicking on the Edit Selected Subject icon in the toolbar of the Subjects pane. To keep subject-specific information, the program also stores a JSON file inside the created subject folder under the name 'subjectinfo.json'. The JSON file can be inspected later by either double-clicking the subject name in the Subjects pane or by clicking on the Edit Selected Subject icon in the toolbar of the Subjects pane. Some information can be changed either in the appearing Edit Subject dialog as well as with any text editor.
In order to inspect the contents of a subjects' folder, one can use the Reveal Folder icon in the toolbar of the Subjects pane (second icon from the right side in the Subjects toolbar). This will open the top-level subject folder in the Finder (macOS) or File Explorer (Windows). Note that both the subject's folder will be empty if no data has been added - except for the generated 'subjectinfo.json' file. A subject can also be removed by clicking the Minus ("-") icon in the toolbar. This function removes all the data of the subject from disk and should, thus, be used with care! Finally the Plus ("+") icon in the toolbar can be used to add a new subject in the same way as when using the Add Subject icon in the main toolbar.
Copyright © 2023 Rainer Goebel. All rights reserved.