BrainVoyager v23.0
Python Code Cells
BV notebooks provide an interactive environment for writing and running code in Python code cells. If a Python code cell is selected (marked by blue indicator), the Python code in the cell can be edited in a similar way as in any other code (text) editor. Syntax highlighting, auto-indentation and tab completion support code writing. If a code line does not fit in the editor, one can click the END (or similar) keyboard button to jump to the end of a line and the HOME or similar button to jump to the front.
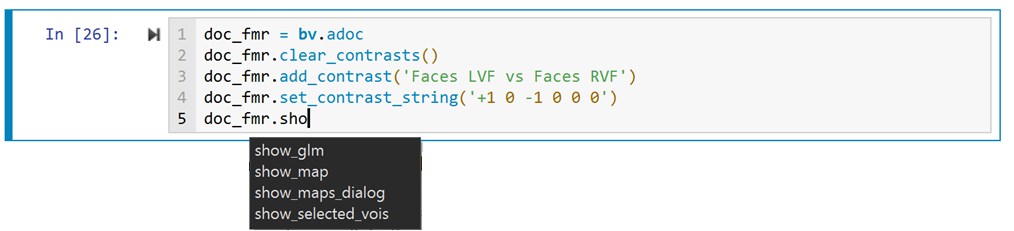
In the screenshot above a function of the document object variable ('doc_fmr') is partially typed in the editor of the current Python cell; dependent on the entered text, the appearing pop-up window displays a list of all function names that can be used for the document object and that are compatible with the currently typed text ('sho'). By pressing the TAB key, the function displayed at the top of the list will be used to complete the typed function name. If the first name is not the desired one, one can either type further until the right (and eventually only) name is on the top of the list; one can also click the correct entry using the mouse or by using the cursor up and down keys to select the desired one in the list followed by a press on the RETURN key. More information for functions of the BrainVoyager programming interface is provided on tab-completion as well as in the API Help Output panel (see below).
Running Code Cells
The code in a selected cell can be executed by pressing CTRL-Return (or CMD-Return) on the keyboard. To also advance to the next code cell after the current code cell has been executed, use Shift-Return or click the 'Play' icon on the left upper side of the code cell (if shown). When running code, any produced text and graphical output will be shown below the code editor. The generated output, thus, is part of the respective code cell. Note that you can clean the output of a single cell or of all code cells by using the respective items in the Cells menu. If you get general error messages when a code cell is evaluated, a Python environment has likely not been specified. To select a Python interpreter on disk, use the Select Python on Disk item in the Python menu of BrainVoyager's main window (or in the menu of the standalone BrainVoyager Notebook application).
BrainVoyager Programming Interface
Besides standard Python modules, BV notebooks (running inside BrainVoyager) can call into BrainVoyager's object-oriented programming interface. Through the always available global object 'brainvoyager' (or 'bv' for short) one gains direct access to most of the functionality offered by the BrainVoyager software. Furthermore, specific processing and visualization tools are provided to support reproducible data analyses and the creation of tutorials. For more details, consult subsequent topics about adding rich text, images, animationss, and embedded 3D viewers. Furthermore, actions in the graphical user interface of BrainVoyager can be converted automatically into Python code that calls the respective BrainVoyager functions. For more details, consult the From GUI to Code topic.
Notebooks provide additional help for functions of the BrainVoyager programming interface when tab-completing partial command names but also when hovering over a BrainVoyager-specific function; the latter not only works in the currently selected code cell but in any code cell (since no code needs to be evaluated for this help feature).
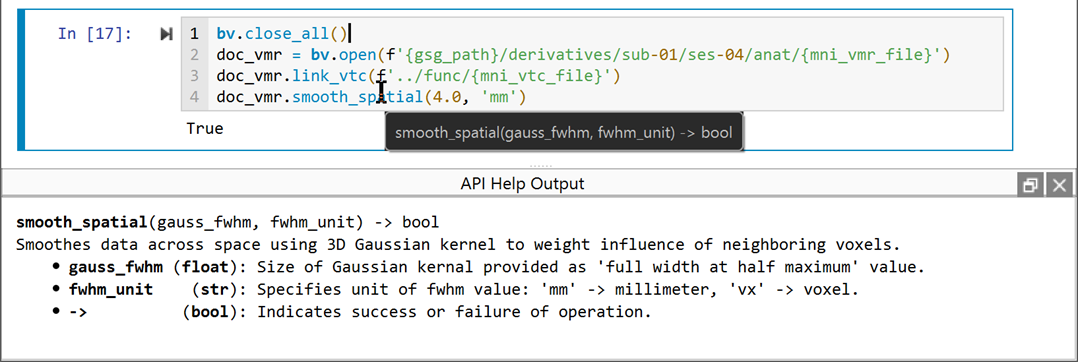
In the screenshot above, the mouse cursor hovers over the 'smooth_spatial' function, which is a command of the BrainVoyager document object. This triggers a tooltip box with information about the signature of that function, including the type and name of its parameters as well as its return type. Furthermore, a short description of the function and its parameters is provided in the API Help Output pane that appears at the bottom of the BV Notebook window but it can be also floated to a different location (see also the 'GUI Adjustments' section in the BV Notebook User Interface topic).
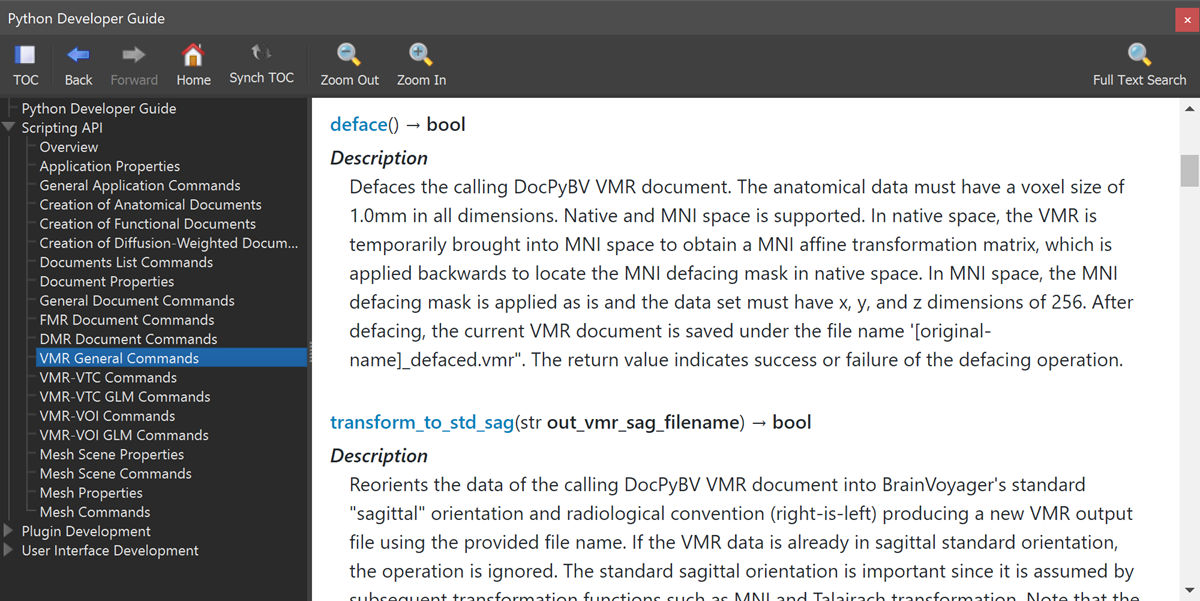
For a more detailled description of all BrainVoyager-specific objects and their attributes and functions, consult the *Python Developoer Guide *(see screenshot above) that can be invoked from BrainVoyager's Python menu.
Special Notebook Python Commands
The BV Notebook provides some built-in Python functionality to increase its usefulness, including commands to query user-defined variables and to embed figures created with matplotlib.
User Variables
The myvars() special global function prints a table with user defined variables, including their names, types and values. Note that within a BrainVoyager session the same Python interpreter is used, i.e. all imported modules, defined variables and functions are available for future use if not explicitly deleted. The predefined function __delete_myvars()__ can be used to delete user-defined variables but it will exclude the global 'brainvoyager' (and its alias 'bv') object from deletion since it is needed to access the BrainVoyager programming interface. It is usually not necessary to call the __delete_myvars()__ command since it is implicitly invoked when a new notebook is created or when the Clear All Cells Output command is issued from the BV Notebook Cells menu.
Embedding Matplotlib Figures
In order to embed plots created with the popular matplotlib module, some special commands have been defined in the 'nbt' (notebook tools) module that is automatically included when starting the BV Notebook. To embed a matplotlib figure it is important to include the 'Figure' class:

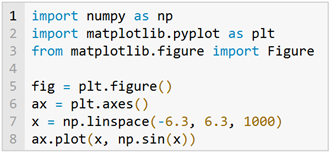
One way to create an embeddable plot is to instantiate the 'Figure' class as shown in the first line below:

The instantiated 'fig' object can then be used to add plots and the returned axis object ('ax' variable above) can be used to plot in a selected subplot. An alternative approach creates a 'Figure' object using the 'figure()' function of the 'pyplot' module:
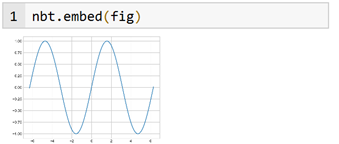
For both versions, the figure storing the plot can be embedded in the notebook simply by issuing the 'embed()' function of the automatically imported 'nbt' module:
For more details and full examples, open the notebooks embed_matplotlib_fig_1.bvnb, embed_matplotlib_fig_2.bvnb and Two-Gamma HRF.bvnb.
Copyright © 2023 Rainer Goebel. All rights reserved.