BrainVoyager v23.0
Coregistration Workflow
The coregistration workflow can be used to align functional (FMR) datasets to 3D anatomical (VMR) datasets of the same scanning session. The resulting initial alignment (IA) and fine-tuning adjustment (FA) transformation files are necessary to run subsequent functional normalization workflows to transform functional (FMR) datasets into normalized (VTC) datasets.
Creating and Connecting the Workflow
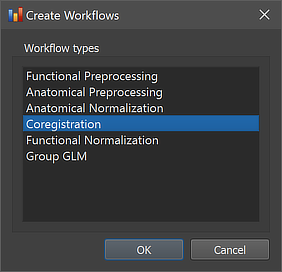
The coregistration workflow can be created using the Create Workflows dialog that can be launched by using the Create button in the Workflows tab of the Data Analysis Manager window. In the appearing dialog, the Coregistration entry needs to be selected (see screenshot below). After clicking the OK button, the new workflow appears in the Workflows tab (see figure below). The ID column indicates that the unique identifier '4' has been assigned to this workflow; the column Type shows the generic name "Coregistration" for the assigned (and stored) type ID (4); the column Name shows the default name "func-to-anat-coreg" that has been assigned to this workflow, which can be changed in the Workflow dialog (see below).
The empty cells in the Input and Output columns of the new entry in the Workflows table indicate that the instantiated coregistration workflow is not yet ready to be executed since no data connections have been made. To connect the workflow to input data, the Connect Workflows dialog is used, which can be invoked by clicking the Connect button in the Workflows tab.
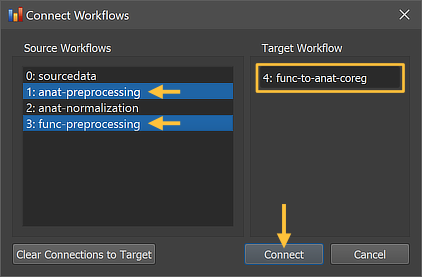
The Connect Workflows dialog shows in the Source Workflows list on the left side all available data sources. A specific workflow is identified by its unique ID and its name ("[workflow-ID]: [workflow-name]"). On the right side the Target Workflow is displayed to which data can be connected, which is the selected coregistration workflow. Since coregistration requires functional and anatomical data as input, two input sources need to be selected. For the anatomical data the "1: anat preprocessing" workflow is selected since its output keeps the data in scanner (native) space, and the extracted and inhomogeneity corrected brain it produces leads to better (fine-tuning) coregistration results than when using the unprocessed original NIfTI data. For the functional source data, the "3: func preprocessing" workflow is selected.
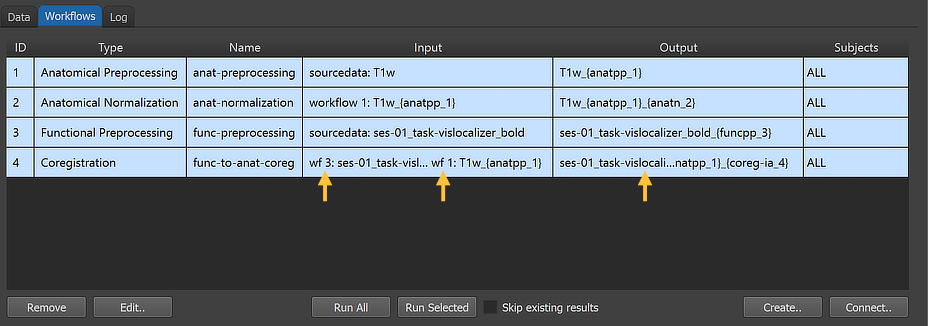
After clicking the Connect button in the Connect Workflows dialog, the established connections are made and the workflow entry is updated accordingly. The arrows in the figure above point to the "wf 3" and "wf 1" strings in the Input column indicating that the coregistration workflow will use input from the output of workflow 3 (functional preprocessing) and workflow 1 (anatomical preprocessing).
Inspecting and Editing Workflow Settings
In order to inspect and eventually change settings, such as parameters that control the processing, one can invoke the Workflow dialog by double-clicking the workflow entry or by clicking the Edit button below the Workflows table after selecting the respective row.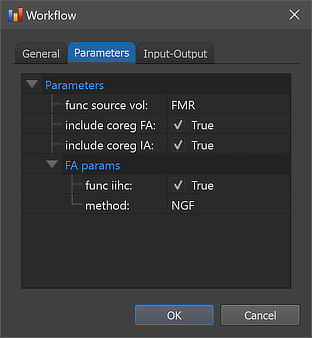
The figure above shows the contents of the Parameters tab of the invoked Workflow dialog showing the parameters specific for the selected coregistration workflow, which can be inspected as well as changed. As default, the include coreg IA and include coreg FA options are set to 'True'. When running the workflow both the initial alignment (IA) step (based on coordinate values stored in files) as well as the fine-tuning adjustment (FA) step will, thus, be performed. While the IA step must be selected (otherwise the workflow will not produce any output), the FA step can be set to 'False' although this is not recommended. For the FA step, two parameters are available in the FA params section. If the func iihc option (default 'True') is enabled, the functional data will be inhomogeneity corrected prior to the (fine-tuning) alignment, which usually improves the fine-tuning alignment step in case the functional dataset exhibits spatial inhomogeneities (e.g. when the outer part such as the cortex are much "brighter" than the middle part of the brain). In case that the functional data is not much spatially inhomogeneous, the option can be turned off to save processing time. The method parameter can be set to either "NGF" (default) or "BBR". The NGF (image gradient based) method works fast and robustly when the data is spatially not too inhomogeneous. The BBR (boundary-based registration) method tolerates intensity inhomogeneities better but requires more elaborate processing including extraction of the white-grey matter boundary in the anatomical dataset.
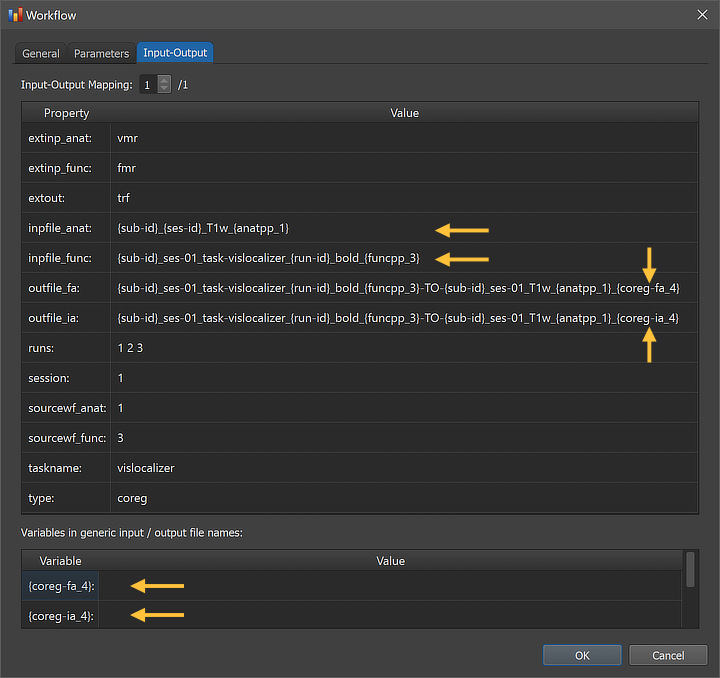
The figure above shows the Input-Output tab of the Workflow dialog, which displays information related to the established data flow connection(s). Each connection (if more than 1) can be viewed by changing the Input-Output Mapping number. The details of the displayed fields are usually not important but it might sometimes be instructive to inspect these (read-only) fields. Probably most relevant are the inpfille_anat and inpfile_func fields as well as the outfile_ia and outfile_fa fields, which show the generic input and output file names with the subject and run substrings replaced by loop variables (enclosed by curly braces '{}'). Besides processing variables added by other workflows, the outfile entries combine the names of the two input names and extend the names with the processing variables "{coreg_ia_4}" and "{coreg_fa_4}". These variables are also shown in the Variables in generic input / output file names field. When running the workflow, processing variables will be replaced with concrete values (substrings) that depend on included processing steps and parameter settings. When inspecting the variables section in the dialog after running the workflow, concrete values for all processing variables will be displayed.
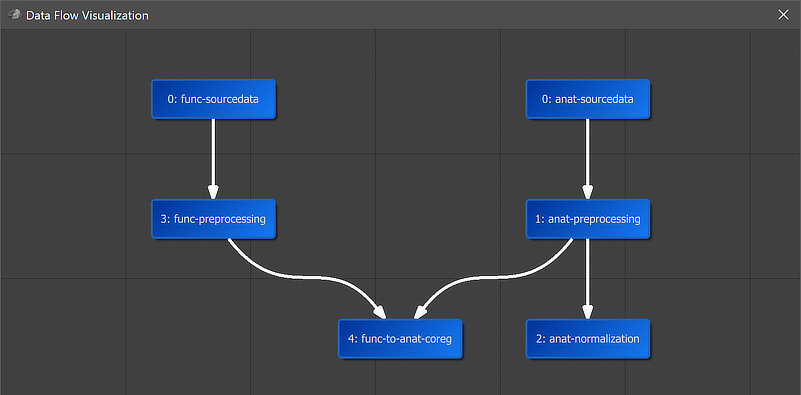
A global overview of the established connection is graphically displayed when clicking the Data Flow button in the main toolbar of the Data Analysis Manager (see screenshot above). In the appearing visualization the "4: func-to-anat-coreg" workflow is placed under the "3: func-preprocessing" and "1: anat-preprocessing" nodes. It is also placed in the middle of anatomical and functional data (since it uses both types of data) and two arrows connect the source data as input with the coregistration workflow.
Running the Workflow
After selecting the workflow in the Workflows table (single-click on its row), the prepared functional workflow can be executed using the Run Selected button (or the Run All) button). In case that the Skip existing results option has been turned on (default: off), the program will not process datasets in case that the expected output data are already available. This option is useful (saving time) in case that one adds more subjects to a project and wants to preprocess only the newly added ones. An alternative way to restrict the workflow to specific subjects is to select the desired subset of subjects in the Subjects field in the General tab of the Workflow dialog.
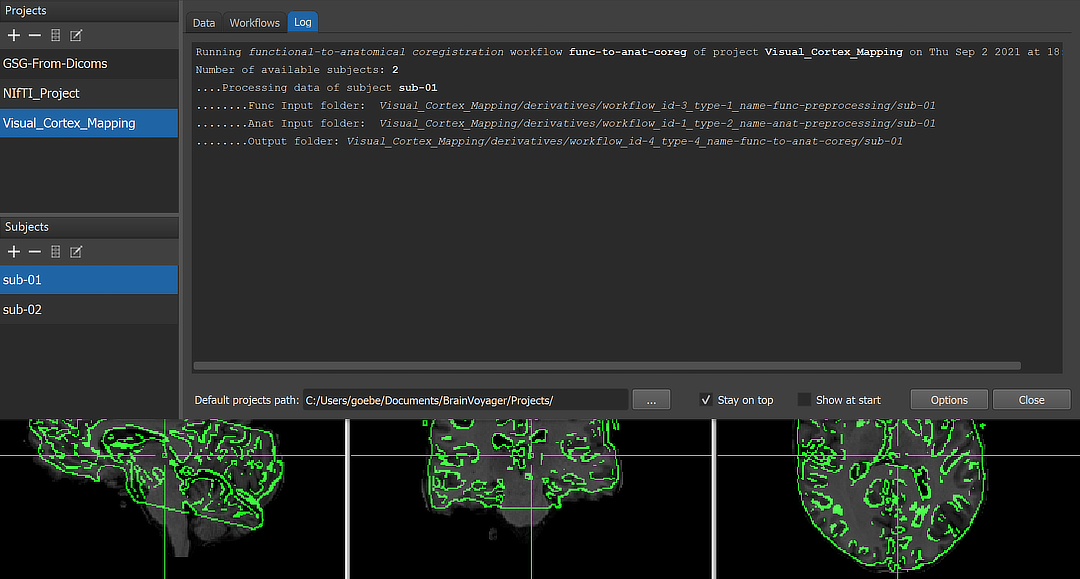
When running a workflow, the program displays the progress of data processing in the Log tab of the Data Analysis Manager window. The screenshot above captures a moment during coregistration of one of three functional runs of subject 'sub-01' with the same-session anatomical dataset.
After the workflow has finished processing, the main produced data files can be inspected by switching to the Data tab of the Data Analysis Manager. While there will be some additional files in the functional preprocessing workflow (such as created functional volume (VMR) files for coregistration), the produced transformation files of the coregistration workflow do not appear here since only those files (documents) are shown that can be launched in BrainVoyagers main window. The figure below shows the generated directory tree of the workflow on disk showing the "IA" and "FA" transformation (.TRF) files for each run of each subject.
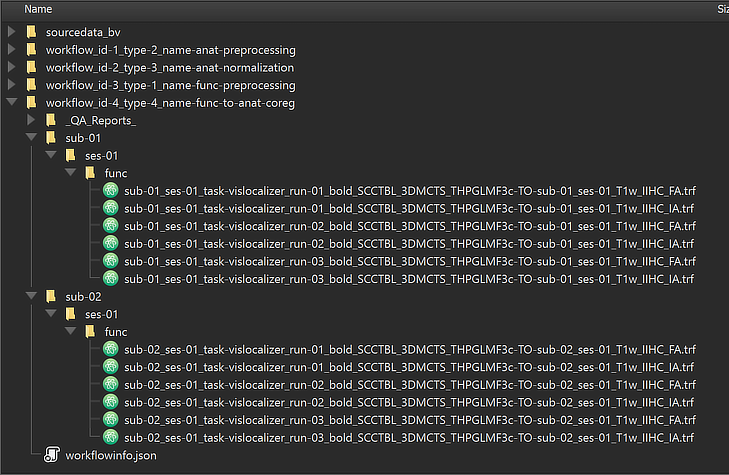
This view illustrates that a workflow on disk replicates the BIDS directory tree for the relevant data (here "func" folders). The produced transformation files are stored inside the created workflow directoy (under the derivatives folder of the project); the name of the workflow folder 'workflow_id-4_type-4_name-func-to-anat-coreg' contains the unique workflow ID ('4'), its type ('4') and its name ('func-to-anat-coreg'). Besides the BIDS sub-directories for each subject, the "_QA_Reports_" folder is also stored inside the workflow directory containing the full log (Markdown) text file and the quality report as a BrainVoyager notebook (see below), which will be shown automatically when the workflow has completed. The workflow report can also be shown at a later time by clicking the Workflow Report icon in the main toolbar of the Data Analysis Manager after selecting the respective entry in the Workflows table.
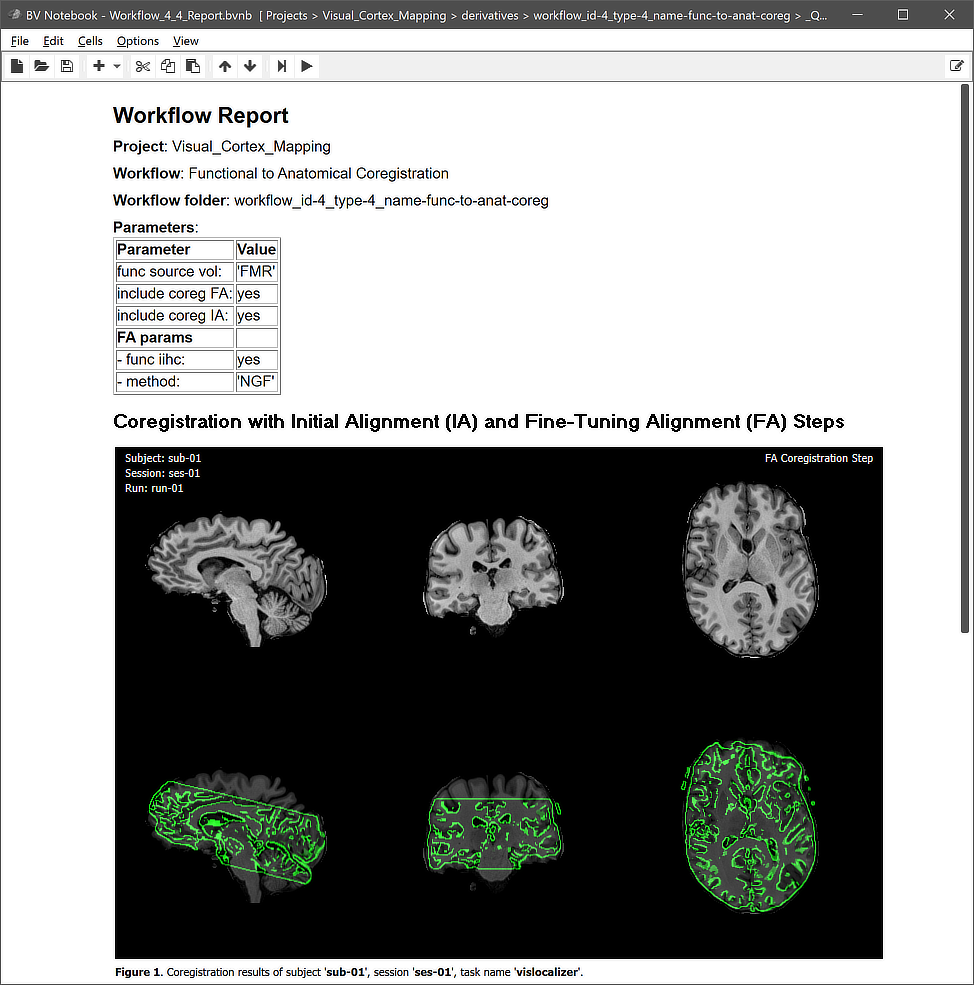
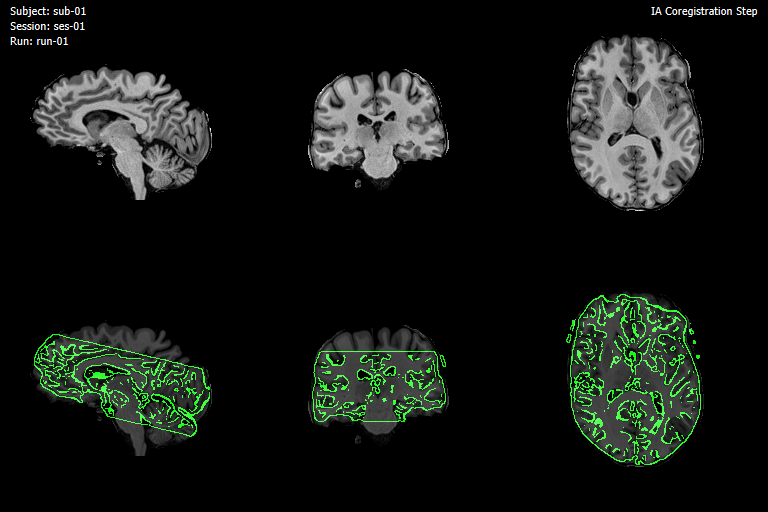
Note that the figures generated per subject contain animations (not visible in screenshot above) that show the results for each run and for both the IA and FA step. The animation embedded in the quality report for coregistration of the three runs of subject 'sub-01' is shown below. Note that the text in the upper left and upper right indicate which run and which alignment step is shown at any moment in time.
Copyright © 2023 Rainer Goebel. All rights reserved.