BrainVoyager v23.0
Preparing a Mesh for CBA
The first step of the cortex-based alignment procedure is the creation of spherical mesh representations from folded cortex meshes. The input to this morphing stage is the reconstructed cortex of a properly segmented brain hemisphere in normalized (MNI or Talairach) space, i.e. files with names like "sub-<ID>_<MNI | TAL>_<LH | RH>_RECOSM.srf". Note that the cortical hemispheres must be without topological errors (e.g. "bridges"), otherwise the to-sphere morphing and subsequent alignment will likely fail.
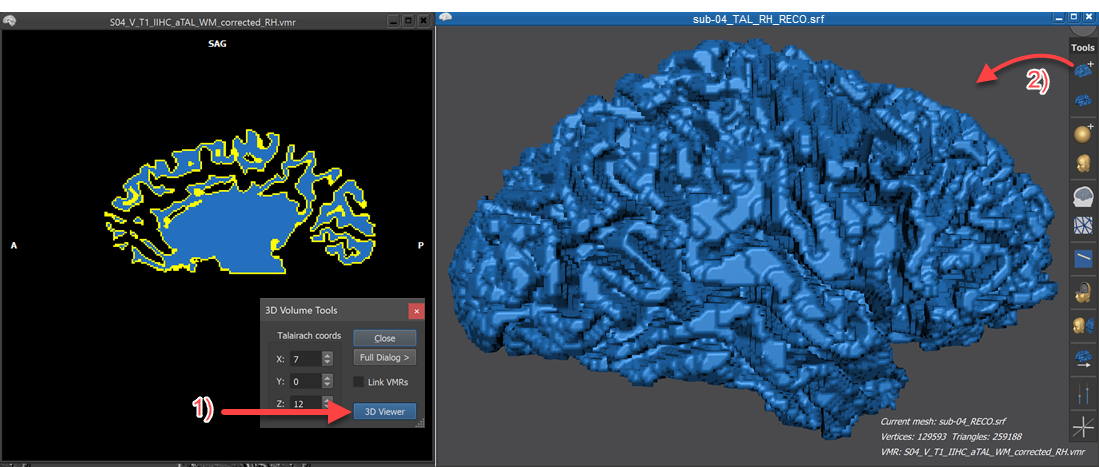
The folded cortex mesh used as input for CBA ("<name>_LH_RECOSM.srf" or "<name>_RH_RECOSM") should usually be the result of a standard cortex reconstruction of a segmented brain hemisphere followed by advanced (non-shrinking) smoothing. These two preparatory steps can be easily performed by launching the 3D Viewer from the currently segmented hemisphere file (step 1 on left side in screenshot above). After clicking the Reconstruct Mesh from Prepared Volume icon located at the top of the Mesh Toolbar (step 2 on right side in screenshot above), a cortex mesh is reconstructed and will appear in the 3D Viewer as shown on the right side in the screenshot above. It is recommended to save the "RECO" mesh under a full file name that should minimally include the subject ID, the hemisphere and the substring "RECO", e.g. "sub-04_RH_RECO.srf". Since version 21.4, BrainVoyager attempts to generate automatically an appropriate file name based on the name of the segmented VMR file used to reconstruct the cortex mesh; also the "RECO" mesh is saved automatically to disk under the generated file name. In case a custom naming scheme is desired, the reconstructed mesh should be saved using the Save Mesh As item in the Meshes menu providing the desired name.
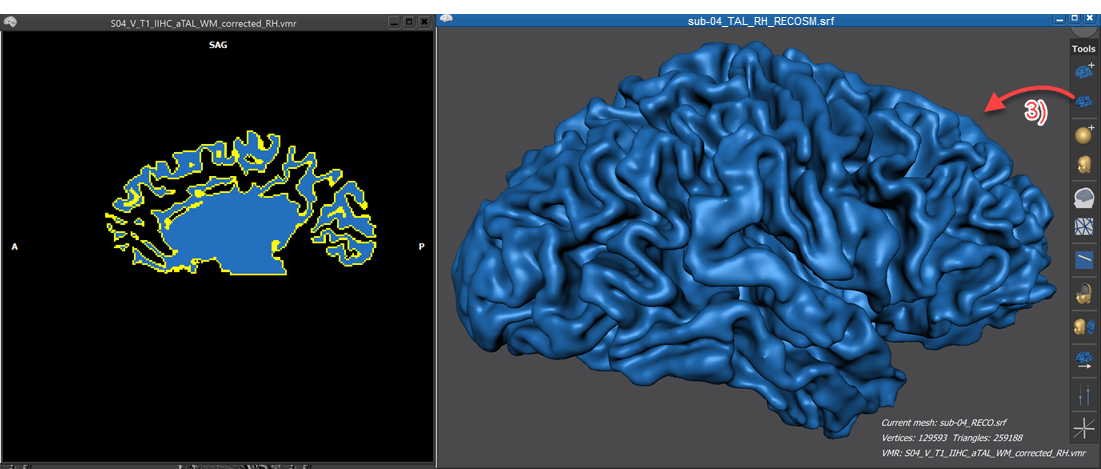
In order to create the "RECOSM" mesh file, the Advanced Mesh Smoothing icon in the Mesh Toolbar can be clicked (or tapped) next (step 3 in screenshot above). After the non-shrinnking smoothing process has completed, it is advised to save the resulting mesh file under the same name as the "RECO" file but by adding the substring "SM" to indicate the smoothing operation, e.g. "sub-04_RH_RECOSM.srf". Since version 21.4, BrainVoyager adjusts the name automatically and saves the smoothed mesh to disk.
Curvature Visualization
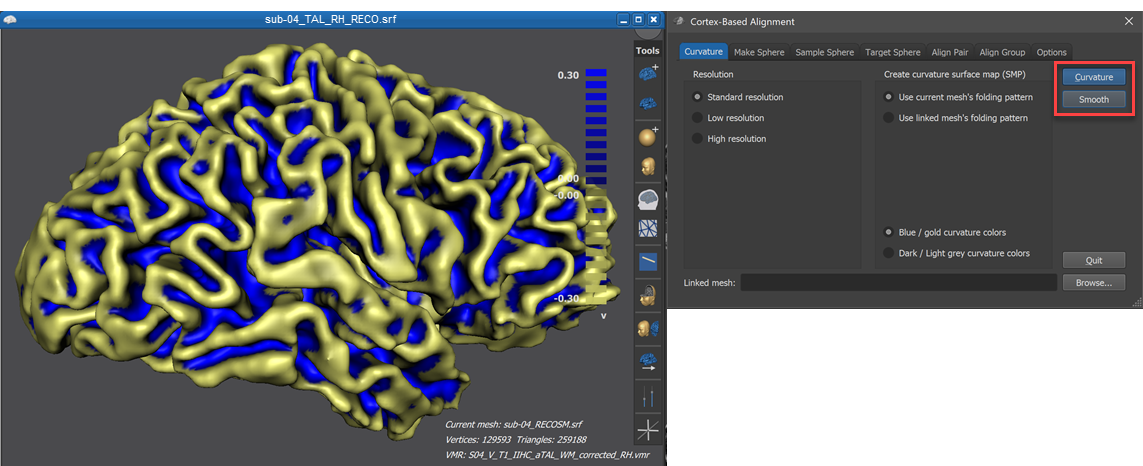
While not strictly necessary, it is recommended to compute and overlay a curvature map on the folded cortex mesh since it allows to identify sulci and gyri when the mesh is morphed to a sphere in the succeeding step. In order to overlay a curvature map, enter the Cortex-Based Alignment dialog and click the Curvature button and then the Smooth button in the Curvature tab. The snapshot below shows the computed curvature map superimposed on a right hemisphere mesh prepared as described above. The overlaid gradual curvature information (blue -> shades of concave curvature, gold-> shades of convex curvature) roughly indicate sulci (blue) and gyri (gold). Instead of blue-gold colors, grey colors can be used, if preferred, by selection the Dark / light grey curvature colors option before clicking the Curvature button.
The mesh is now prepared for the next step - the gradual transformation of the folded mesh into a spherical representation.
Copyright © 2023 Rainer Goebel. All rights reserved.