BrainVoyager QX v2.8
Masking and Cutting
While volume rendering of (transparent) brains with superimposed functional data may produce nice visualizations, well-prepared cuts might be helpful to highlight information at specific locations. Cutting and slicing is implemented as a masking process, i.e. calculated masks determine what parts of a volume will be shown. In order to specify cuts, the Create Mask button in the Masks field of the Controls pane can be used.
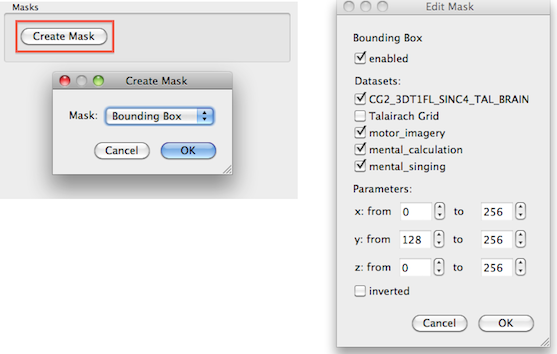
The appearing Create Mask dialog allows to select three masking options, Bounding Box, Plane and Slices. Bounding Box masking can be used to create cuts that are parallel to the three principal axes of VMRs; Plane masking can be used to cut along arbitrary rotated and positioned slices; The Slices masking option produces a series of slices (at present it is not possible to edit the slicing and it will be discussed in a subsequent release). Note that the Bounding Box Edit Mask dialog (right side above) allows to apply cutting selectively for specific anatomical and functional volumes that can be used to produce interesting results. In the snapshot below an axial cut through the middle of the data set (y: from 128 to 256) has been set for all volumes (except the "Talairach Grid") as indicated above showing functional data from the three included statistical maps on that slice.
Note that the Masks field now contains an entry for the sepcified mask. One may add multiple masks by using repeatedly the Create Mask button. Specified masks can be turned on and off using the check box on the left side of a mask name. A listed mask can be removed using the Remove button. To change mask settings, the Edit button can be used.
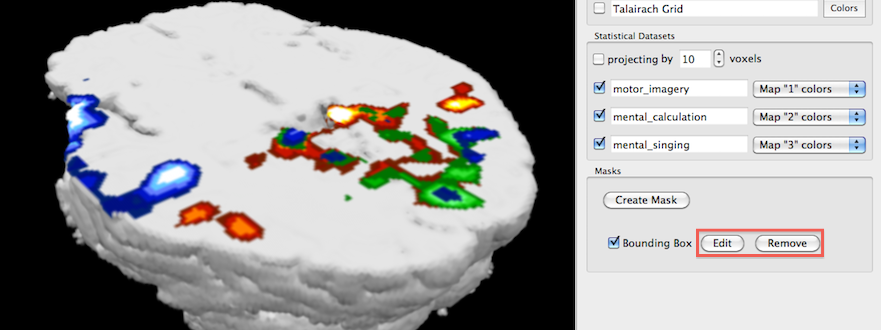
In the snapshot above the bounding box mask was edited by simply excluding the "mental singing" functional volume from cutting allowing to see the full extent of that map rising over the cutted lower part of the brain.
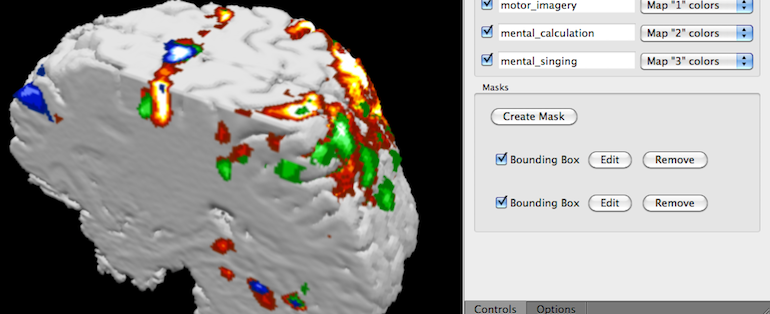
In the snapshot above two Bounding Box masks have been defined combining a axial with a sagittal cut. Note that changes in the Edit Mask dialogs are performed instantaneously introducing rendering delays of a about a second since preparatory calculations have to be performed internally.
While the performed cuts produce good results, the intensity values within the cut slices are not shown. This can be, however, turned on by checking the Use intensity values option in the Color Table dialog (see red rectangle) for a specific anatomical volume. In the snapshot below that option has been turned on for the same cutting as shown in the snapshot above.
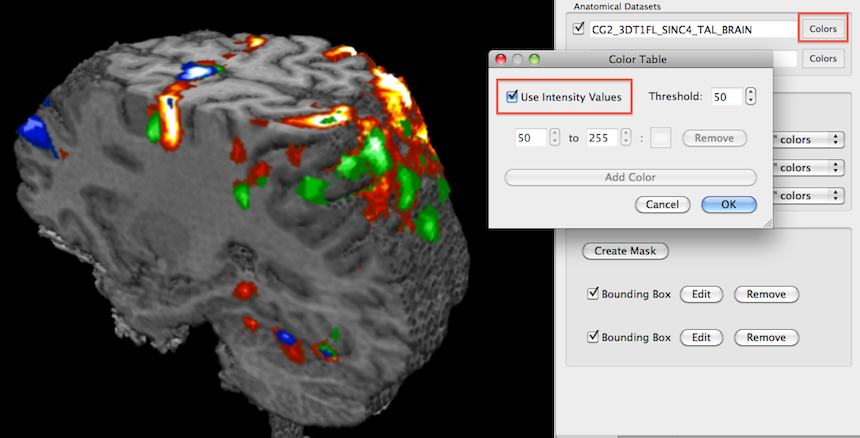
This intensity-based color coding produces nice results in slices but the rendered boundary of the brain might look a bit "checkered" since the intensity values are not constant across border voxels.
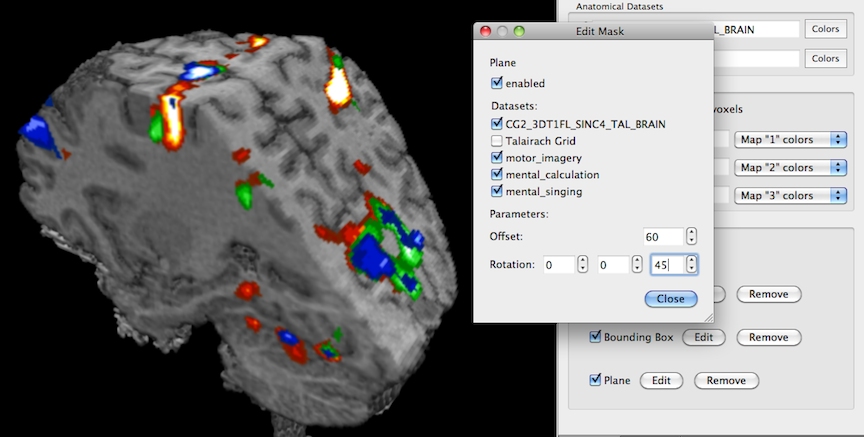
In the snapshot above a plane mask has been added to the two bounding box masks. As the Bounding Box Edit Mask dialog, the Plane Edit Mask dialog allows to include and exclude any available anatomical and map volume; the difference to the bounding box mask is that a plane can be defined that slices along an arbitrary direction by changing plane position with the Offset value and plane rotation with the x, y, z Rotation values.
Copyright © 2014 Rainer Goebel. All rights reserved.