BrainVoyager QX v2.8
Adding Bitmaps
Movies can be made more expressive with the possibility to add bitmaps. Bitmaps can be embedded in a movie in two ways, as the content of a "virtual screen", which moves with the scene and as explanatory bitmaps, which remain in a 2D plane when the scene viewpoint changes.
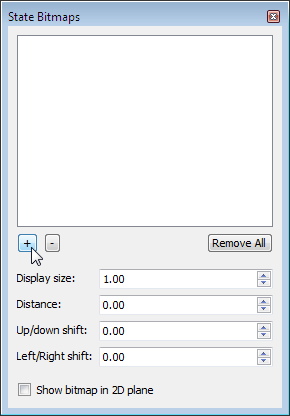
Bitmaps can be associated with a state using the State Bitmaps pane (see snapshot above), which can be invoked by clicking the Bitmap icon in the toolbar of the Movie Studio window. A bitmap can be added to the currently selected state by clicking the "+" selection button. An existing bitmap can be removed by selecting it in the Bitmap list followed by a click on the "-" button. The Remove All button allows to delete all bitmaps associated with the current scene. If the Show bitmap in 2D plane option is checked, the new bitmap will be shown non-transformed on the screen. This mode is useful for presenting explanatory text or graphics information. When the option is turned off (default), the bitmap is put on a virtual screen moving with the scene viewpoint. This mode is useful for activation movies where stimuli may be presented in front of the head/brain of a subject.
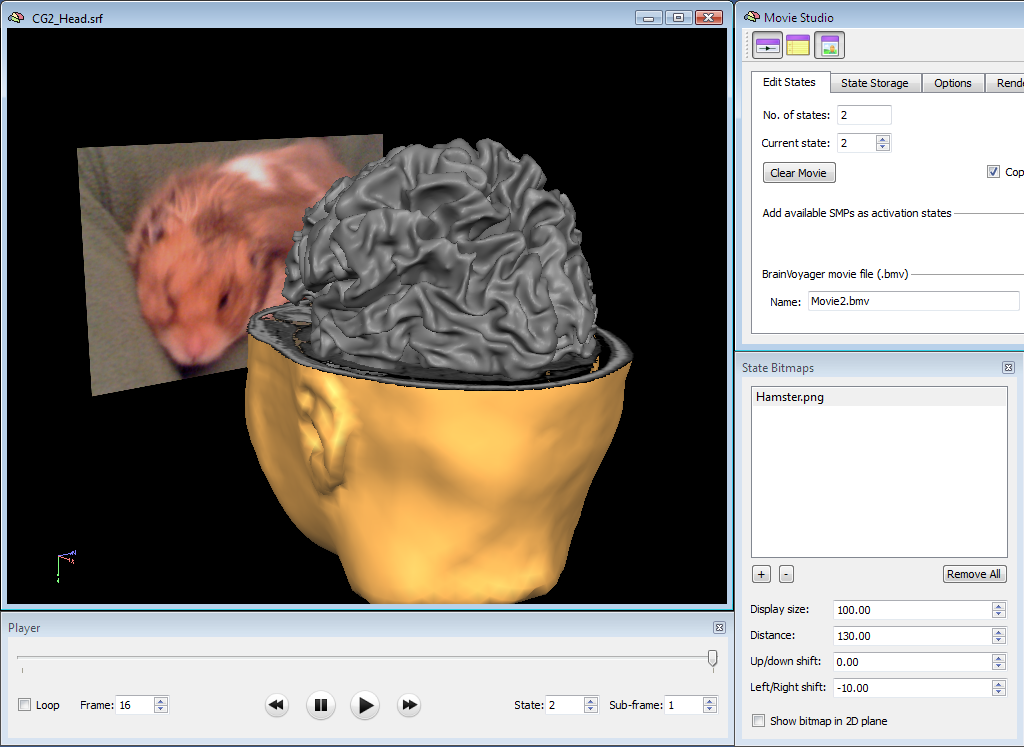
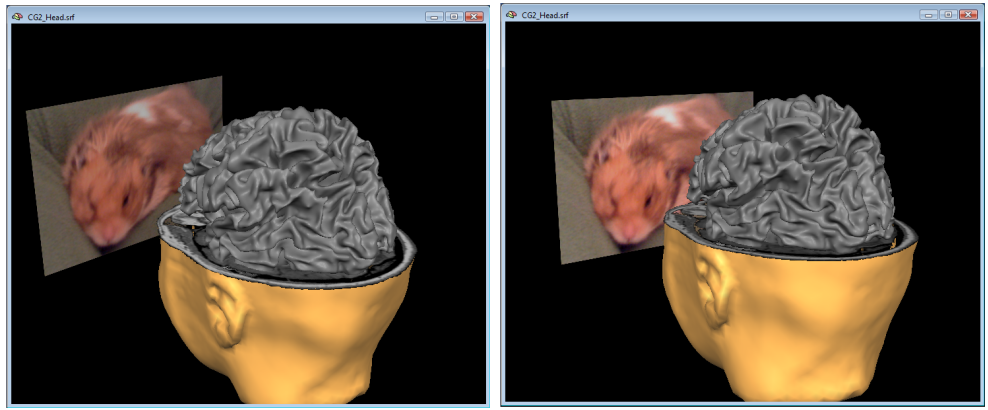
The snapshot above shows a state with an added bitmap ("Hamster.png") in the "virtual screen" mode. Note that the image is drawn in 3D space in front of the head and brain meshes. If the scene viewpoint changes, the "virtual screen" position will be transformed accordingly staying in a fixed position relative to the other objects in the scene. The snapshots below shows two frames of the movie showing that the screen bitmap moves with the meshes.
Note that you may want to turn on perspective viewing in the surface window in case of activation movies, which result in more realistic renderings than when using orthographic viewing mode.
Bitmaps can be placed in the scene or in the viewing plane by changing the values in the Up/down shift and Left/right shift values. The size of a bitmap can be adjusted by changing the Display size value. The distance of the virtual screen to the rendered meshes can be adjusted using the Distance spin box.
Note that only one bitmap can be used as a "virtual screen", all other bitmaps stay in the viewing plane when the scene viewpoint changes. It may be useful to have some parts of a bitmap rendered transparently. This can be achieved by setting the respective pixels in the image to red, green and blue values of R=0, G=0 and B=0. Note that if one wants non-transparent black values, use small RGB values, e.g. R=1, G=1, B=1.
Copyright © 2014 Rainer Goebel. All rights reserved.