BrainVoyager v23.0
Lighting
While not as essential as fundamental parameters, proper lighting can help to highlight information and to improve the quality of volume rendering results. The goal of lighting in 3D graphics is to simulate light sources and the way that the light that they emit interacts with objects in the scene. The volume renderer currently simulates only one light source that is positioned in front of the imaging plane. The light rays run in parallel simulating a light source far away (like the sun). The figure below shows the result of lighting calculations with specular highlights, which are produced by simulating a material with strong specular reflections. Note that the Gold LUT was used for this example.
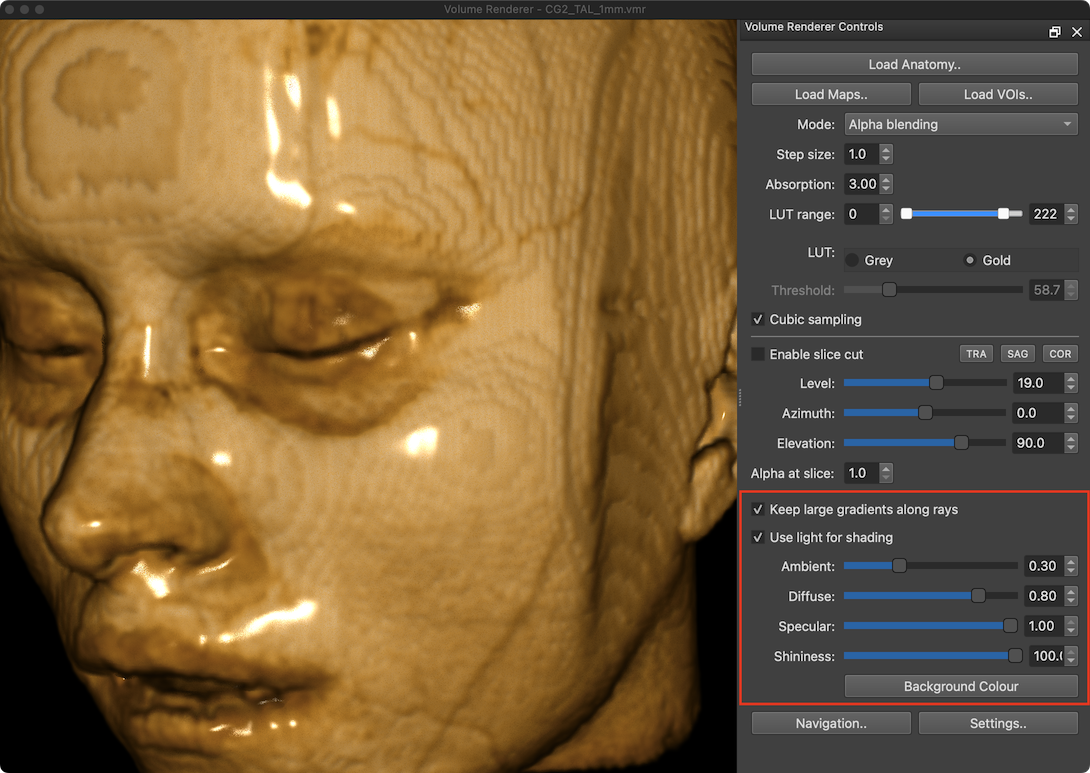
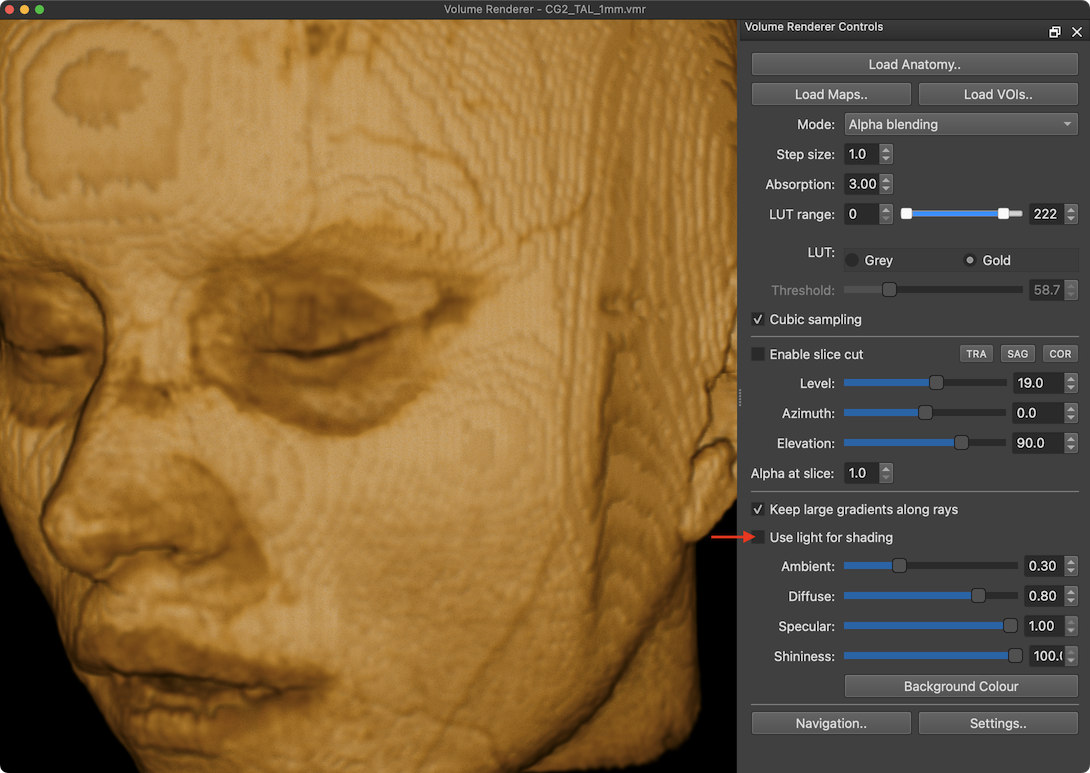
The lighting options of the Volume Renderer are available in the right lower section of the Volume Renderer Controls panel (see red rectangle in the screenshot above). Lighting calculations can be turned on (default) by checking the Use light for shading option. The screenshot below shows the same volume rendering from the same viewpoint as above but without turning on the lighting calculations (see red arrow).
In case that lighting calculations are turned on, one can use the Ambient, Diffuse, Specular and Shininess sliders (or spin boxes) to change the reflective properties of the simulated 'material' in the volume. Most reflective properties depend on the calculation of intensity graidients at locations where rays hit the tissue in the volume. Unlike a mesh surface, volume rendering accumulates intensity values in depth until an 'opaque' threshold is reached. To properly calculate a gradient for light reflections, gradient values need to be accumulated and averaged as well when traversing through voxels. This process may lead to visual artifacts when averaging many small gradient values pointing in various directions. To improve the lighting result, a common technique in volume rendering is to keep the largest gradient encountered by a ray before reaching the opaque threshold, which is then used for lighting calculations. This feature can be used by checking the Keep large gradients along rays option, which is enabled as default.
The Ambient slider (and spin box) modulates a general level of illumination that does not come directly from a light source; ambient light is, thus, useful to change the overall brightness of the rendering result. Moving the Ambient slider to the right increases the overall brightness while moving the slider to the left leads to darker rendering results.
Diffuse reflections scatter an incoming ray of light in all directions equally. The strength of reflection depends, however, on the local orientation (curvature) of the hit material providing important visual cues about the shape of objects. The Diffuse slider (and spin box) modulates the level of reflections with respect to the direction of the simulated light rays and the calculated intensity gradient at the hit location in the volume.
As opposed to diffuse reflections, a perfect specular reflection is "mirror-like", i.e., the reflected ray makes the same angle with the 'surface' (estimated by the gradient) as the incoming ray. A specularly reflected ray can only be seen by the viewer in case she is in exactly the right position, i.e. somewhere along the path of the reflected ray. The Specular slider (and spin box) can be used to increase or decrease the strength of specular reflection. Moving the slider completely to the left side (specular value = 0.0), specular reflections will be removed entirely.
Specular reflections depend on the shininess of a simulated material, which determines how 'perfect' specular reflections will be calculated: The more shiny a simulated material is (e.g. metal), the smaller the specular highlights becomes since the reflected rays emanate in a narrow cone around the perfect reflection angle. A duller simulated surface material will produce wider cones of reflected light and, thus, bigger, fuzzier specular highlights. Moving the Shininess slider to the right (larger values in the Shininess spin box) will lead to small and sharp specular hightlights while moving the Shininess slider to the left (smaller values in the Shininess spin box) will lead to larger and fuzzier specular highlights.
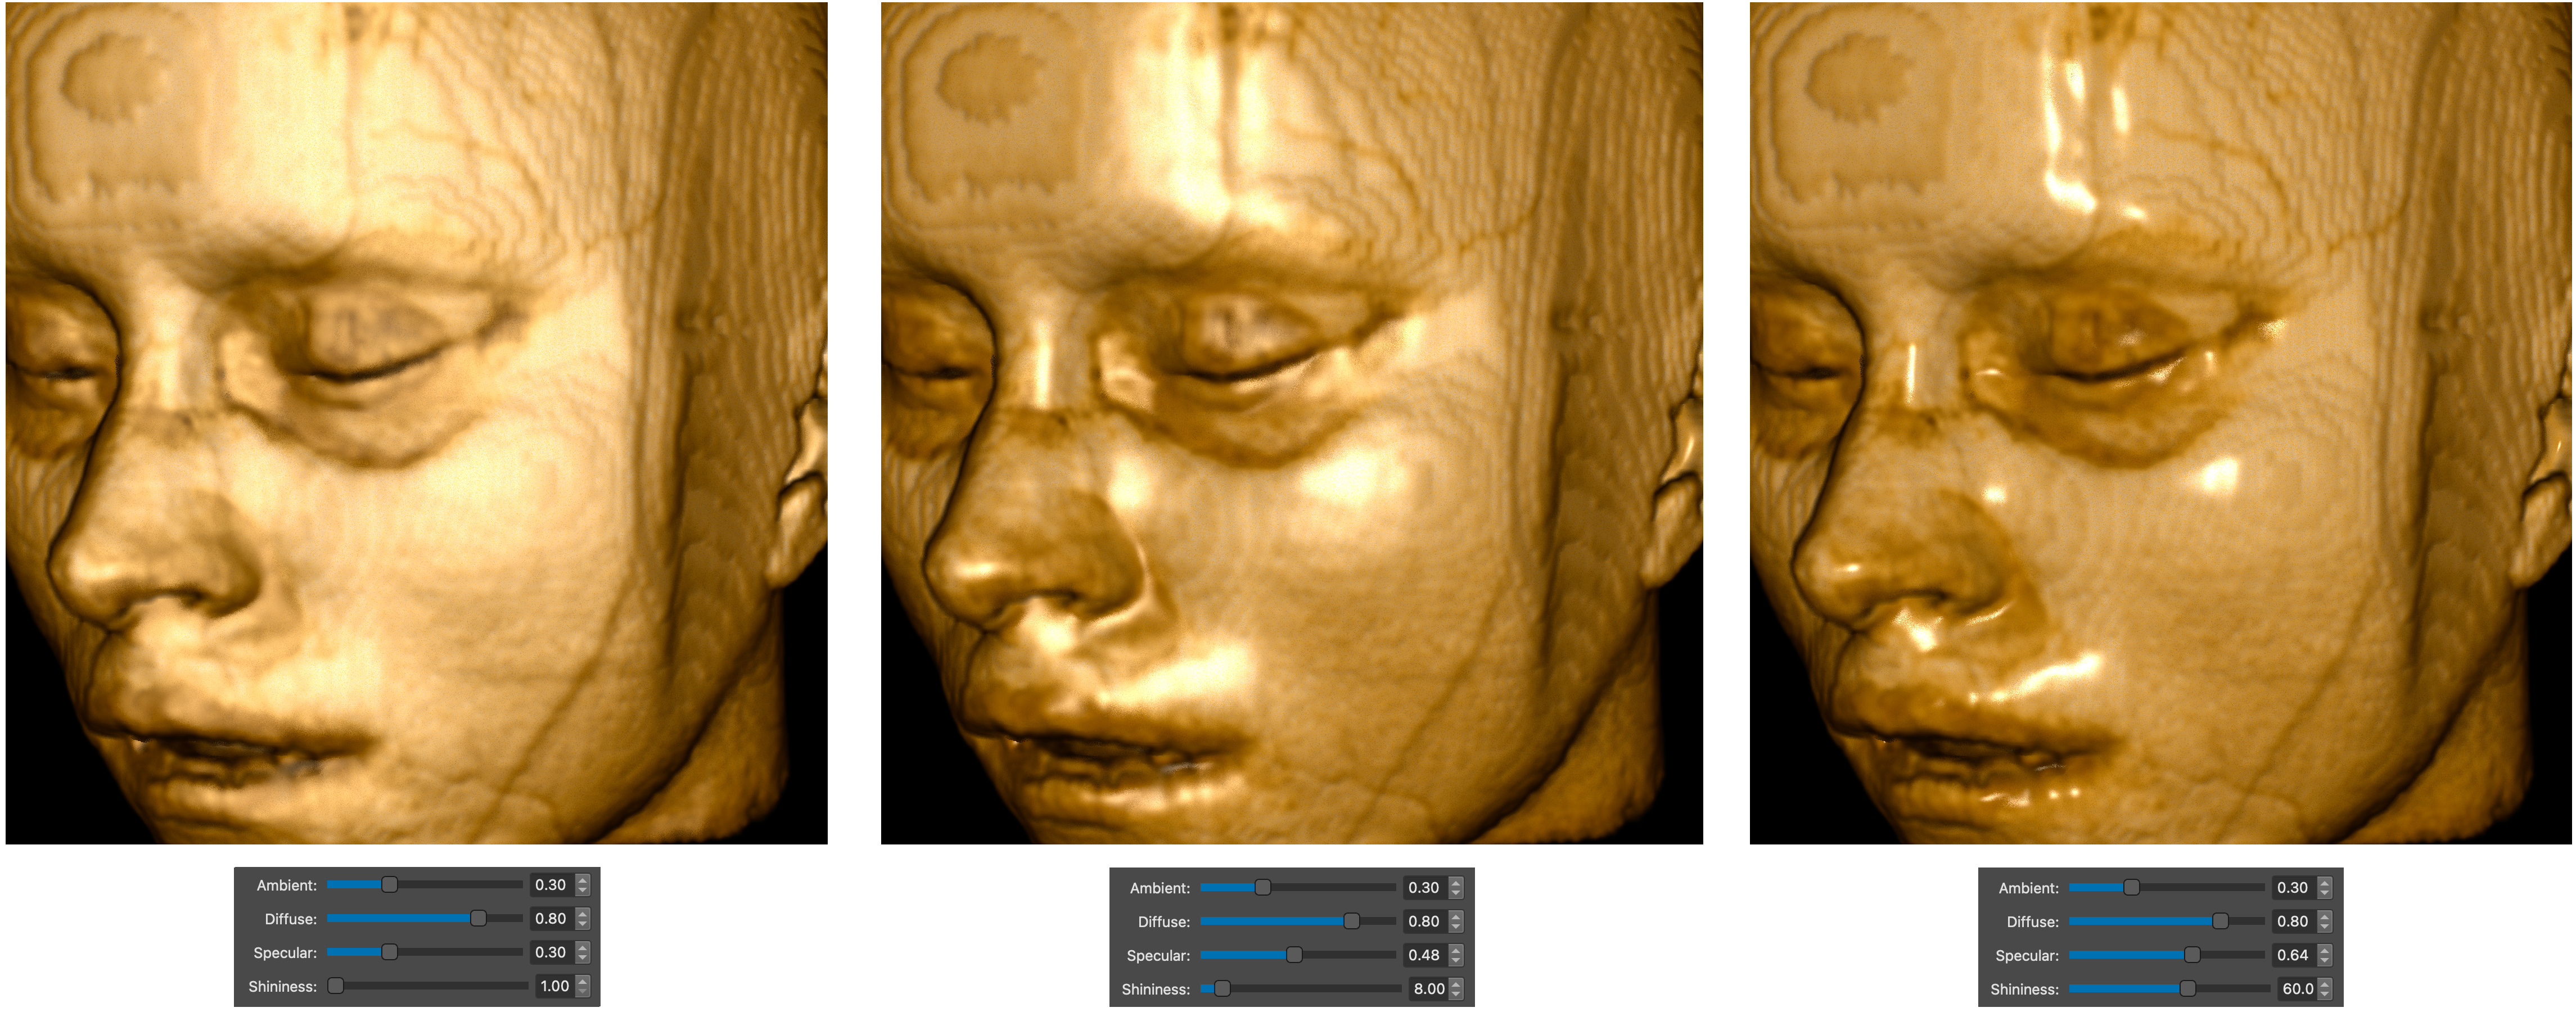
The screenshot above shows the dependence of specular reflections and the shininess of the simulated material. On the left side the lowest shininess value (1.0) is used resulting in broad and fuzzy specular reflections. The middle panel shows the result when using a larger shininess value (8.0) leading to more focused (intermediate level of) specular highlights. The panel on the right shows the result when using a very high shininess value (60.0) leading to small and sharp specular reflections.
At the bottom of the lighting field, the Background Color button can be used to change the color of the background. The default color of the background is black but can be changed to any other color such as white. Note that in case you want to keep the specified color across BrainVoyager launches, you need to check the Restore last background color option in the Volume Renderer's Settings dialog, which can be invoked by clicking the Settings button at the bottom of the Volume Renderer Controls panel (or via the context menu of the volume rendered view).
Copyright © 2023 Rainer Goebel. All rights reserved.